Earlier this week the decentralized prediction market, Augur, went live for all to use. For those unfamiliar, Augur is a decentralized application that allows anyone anywhere in the world with a desktop and an internet connection to do three things: (1) create a speculative market on the outcome of an event, (2) participate in any of those markets, and (3) it enables anyone to report on the outcome of those events for a reward.
Below I’ll describe how you can participate on the Augur platform. This is an introductory how to and not definitive nor comprehensive. This post is intended to give you an idea of what the platform looks like and rough breakdown on how to use it. The Augur community themselves will be producing some even more in depth how-to’s and explanations as well as updating and improving what you see today.
Keep in mind this the first release of a bleeding-edge open source financial application running on the Ethereum platform. This means you will have to own and use Ether(ETH) to participate in certain actions. To participate in other actions you’ll have to use the native application token known as Augur “REP” which is short for “Reputation”. These requirements are analogous to those participating in US financial markets needing to own US Dollars(ETH) to get access to financial products and for those who want to drive a taxi in NYC, taxi medallions are needed(REP). The point being you need certain instruments to perform and participate.
Users should also be aware that this is the first release of a new species of application. Our experience has been good but mixed. It requires some patience and personal responsibility. The Augur community knows this and would appreciate any and all constructive feedback, as well as contributors.
Just by reading this piece you are at the tip of the spear of a revolution. A revolution in which a new financial system is being refactored and rebuilt from the ground up with open source software. Welcome to the front lines and enjoy the journey. It’s been more than interesting and it’s just getting started.
Download and Create an Account
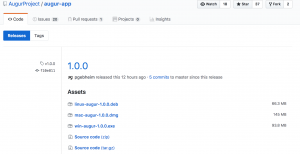
First, go to the Augur Github page and download the latest release for you particular machine.
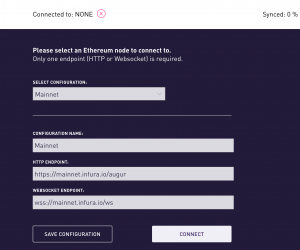
After downloading the application, open it up and the below should be the first screen you see. You have multiple options within it. This is the configuration we tested with. Press connect to start syncing.
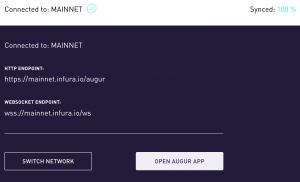
Next, once you’re full synced on MAINNET, click on the “Open Augur App”. This will open a tab on your browser. We were working with Chrome when interacting with the application. Make sure your browser is supported.
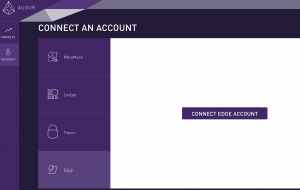
Below is the screen you should see in your browser after you click on the “Open Augur App” button. Next click on the “Account” button in the upper left hand corner. You’ll see 4 options to connect an account.
Edge is the only option in which you don’t have to own other hardware or install other apps. But if you do already have an Edge account, you can use your mobile Edge Wallet to scan a QR code and create an account for your Augur. Click on “Connect Edge Account” and you’ll see the two options available to you.
If you don’t have an Edge Wallet tap on “Create Account”. If you have an Edge Wallet account or want to set one up to use the [Scan Bar Code] feature, tap on “Download Edge”. Note that this provides a much more secure account option..
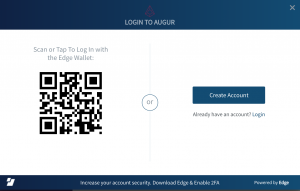
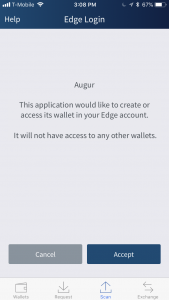
If you have the Edge Wallet or just set one up, scan the bar code with the scan button at the bottom of your wallet. The Edge Wallet will recognize the Augur application, ask you for permission, and will log you in if you tap on the “Accept” button.
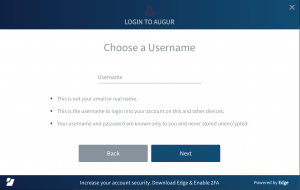
If you don’t want to use the scanning feature and just want to create a new account you can do that to. You’ll be prompted to set up a Username, PIN, and password combo that is unique and only known by you. Below is the prompt to set up a Username.
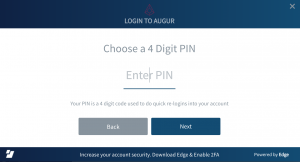
Next you’ll be prompted to set up a PIN which is used to do quick re-logins into your account.
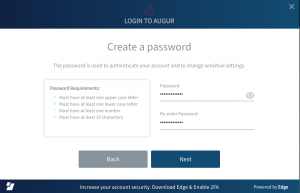
Set up your password
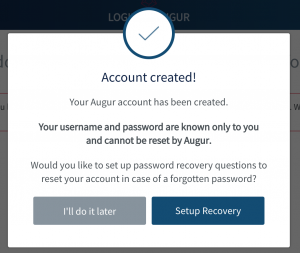
After setting up a unique username, password, and PIN, your account will be created. After that you’re allowed to set up account recovery for the account you just created. You’re also able to click on “I’ll do it later” if you want to skip this step. If you do want to set up a fail safe, click on “Setup Recovery”
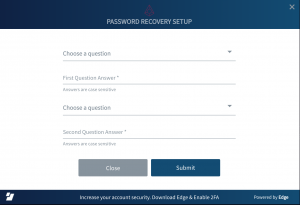
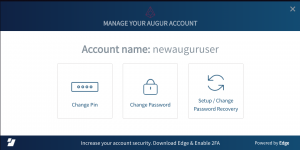
You’ve successfully created an account. Now its time to use Augur!
Create a Market
As stated before, anyone, anywhere can create a market. After downloading the Augur software and creating an account go to the tab that says “Market”. Below I set up a sample “Market Question”.
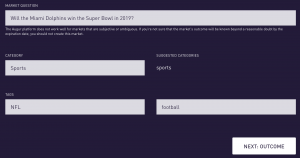
After setting up the “Market Question” you choose the range of conditions participants would be considering when engaging with your market.
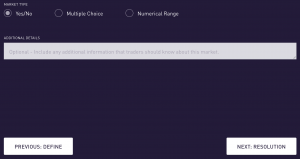
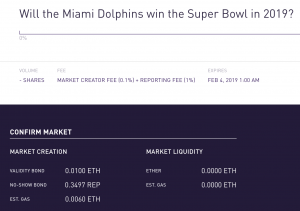
Next you’re going to stake different amounts of ETH and REP to set up your market. This is primarily done to incentivize your behavior. There are 3 distinct “costs” to set up a market on Augur: A Validity Bond(ETH), a No-Show Bond(REP), and a Market Creation Gas Cost(ETH).
Each cost besides the Market Creation Cost, act as a deposit paid by the Market Creator, meaning if the desired action happens, you as the Market Creator get what you staked back after your market has closed.
The “Validity Bond” incentivizes market makers to create “valid” markets, meaning markets that can be validated in some way by reporters on the platform. If the market is too confusing, unknowable, un-reportable, and/or illogical, the market will resolve as invalid. In this case the bond will not be returned to the Market Creator and instead will be paid out to reporters.
The “No-Show” bond incentivizes market creators to assign reliable reporters to report on their market. If the assigned reporters do report on the market then the bond will be returned to the Market Creator. If the assigned reporter is a “No-Show” and doesn’t report on the market, the task will be assigned to another reporter and the fee will go to this reporter.
After specifying the parameters you’ll be able to review all the parameters and conditions of your market and confirm that market.
Participate in a Market
Below is an example of a market some other participant on Augur set up. If you are interested in participating in a market click on “Trade”

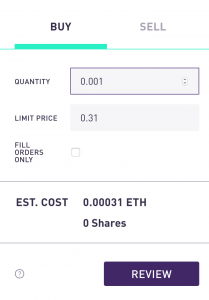
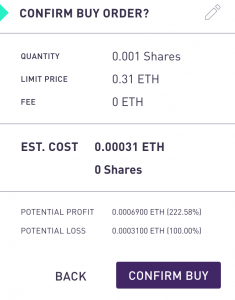
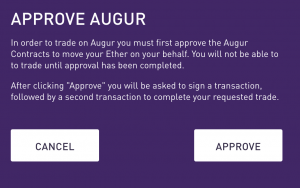
Next you’ll be able to buy “shares” in a particular outcome of a market. You can buy shares in whatever outcome you think is most likely to transpire or you may not even think it will transpire but you think that outcome is underpriced at that moment. Buying shares in a particular outcome means when that particular market closes and an outcome is reported to the market if you were holding shares to the corresponding outcome that did in fact happen you not only get back what you put in to the market but you also see a reward on top of that for being right. That is a long winded way of saying “if you’re right you win money”. The size and return of that reward is highly dependent on that particular market and your particular participation.
Alternatively, if you hold shares of the wrong outcome when the market closes then you will lose what you put in. “If you’re wrong you lose money”. This is no different from most speculating activities and markets.
You should keep in mind these are live markets and you are not beholden to your position or “shares”. You can trade your position at any time up until the market closes. So if you buy shares of a certain outcome early and the price of those shares go up in the market you are free to sell that position and make a profit before the event has even happened. Likewise the relative pricing of your position can decrease overtime and at anytime before the actual closing and reporting of the market.
We briefly walked through creating an account on Augur using Edge, creating a market on Augur, and participating in a market on Augur. In the next post we’ll cover how to report on markets within Augur. This is one of the more unique aspects of Augur and an interesting example of decentralization and the future of work.
For more information on Augur visit augur.net and check out the project’s blog for the latest updates.
