 4 Min Read
 Two-factor authentication (commonly known as 2FA) is a way of confirming a user’s identity by utilizing a combination of two different factors. An everyday example of this is using an ATM. When a person wishes to use an ATM they insert their card and are asked for their PIN. The card is the first factor and the PIN is the second.
When an Airbitz user enables our One Touch 2FA, with a tap of a button our architecture makes it such that only that specific device will be able to access that account as opposed to many other 2FA schemes which use your phone number as the second factor. Using a phone number as a second factor is better than not using 2FA at all but is still a security risk because attackers can socially engineer your phone number and convince the phone company to send them a 2FA code via SMS.
This just happened to a user of Coinbase and even many prominent bitcoiners have been attacked this way. If these relatively knowledgeable technologists had an Airbitz account with our One-Touch 2FA set up this scenario could have never taken place. By linking the second factor to your device instead of a phone number, the attacker will be unable to access your account because it is now locked and tied to the device with the specific 2FA token. Even if the attacker has the correct username, password, and phone number, none of this will give the attacker access to your bitcoin.
The user can choose to add additional devices by scanning the token on the original device so that more than one device can access that account. Any other devices that have not scanned the token will not be able to sign into that account, even if the username and password are known. Unknown devices will instead be prompted to scan the token in order to gain access to the account.
When users utilize our One Touch 2FA they don’t have to copy and paste any 2FA codes or install other applications like Google Authenticator. The device itself has the token which leads to a smoother and easier user experience as well as a better security architecture.
Any other devices that attempt to access the account will need to scan the token in order to access the account.

A user can share their 2FA token with any other devices they’ve downloaded Airbitz on. The second device can scan the 2FA token on the first device and this allows the second device to be logged in to without entering a 2FA code every-time. All a user has to do is sign in to the new device by providing the correct username and password.
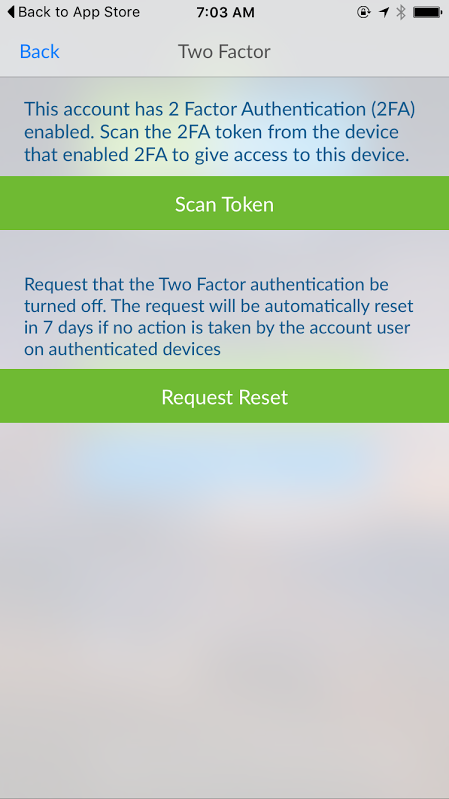
In the event that the original device is lost or destroyed, the user can still use a new device and regain access into the account by resetting the 2FA. When the user accesses their account with the new device that has 2FA enabled, they can simply reset it and in 7 days it will reset and the user can then access the account again. If it was an attacker trying to login and reset the account, the user would receive a notification allowing the user to either let it reset after 7 days or to take action and keep 2FA thus rejecting the reset and preventing the attacker from being able to access the account.
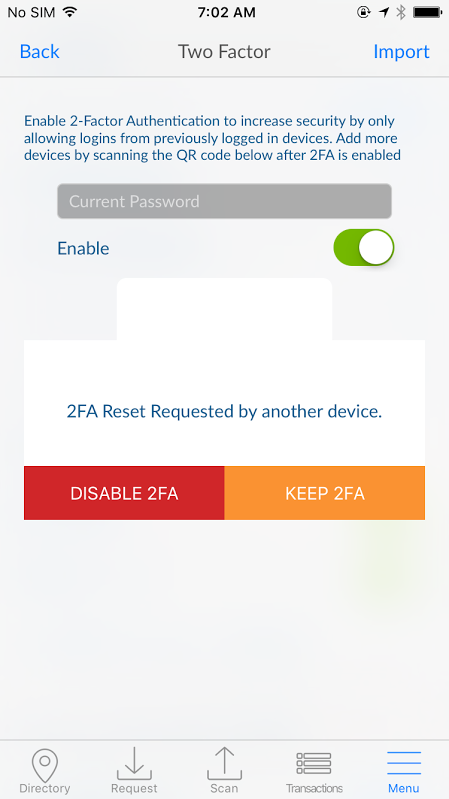
If a login is made from a device that is not authorized, the user will receive a notification allowing the user to keep 2FA or to disable it.
Below are instructions on how you can set this up and better protect your account.
- Log into your Airbitz account and go into Settings
- Inside the Settings Screen, scroll down and tap on 2 Factor (Enhanced Security)
- Enter your password and tap to enable
If you’d like your other devices to be able to log into the account, tap on Show QR Code on the original device that had set it up and have the new device scan the QR Code to grant access.
That’s all there it is to it. Once enabled, even if someone somehow knows your username, password, and phone number they will still not be able to access your account.
Stay safe, enable 2FA, and Hodl!
2FA Video Tutorial Links:
Tutorial in English: https://www.youtube.com/watch?v=uv1I6VUeGoA
Tutorial in Spanish: https://www.youtube.com/watch?v=jtbuGm4BwT4


